Pleated Back Flowy Tee

In early September, one of our local sewing machine dealers had a two-day event with Pamela Leggett, creator of Pamela’s Patterns.

Day one, part one was an overview of her background (which was extremely interesting) and discussion of techniques to improve sewing skills.  Description:  Are you ready to make the perfect garment?  The difference between “just OK” and “fabulous” are often simple techniques in stitching, pressing and notions.  This class will show you many unique was to make your garments look professional.

Some of these tips are in her Craftsy class, Fashion Sewing and Serging Techniques.  She is an excellent instructor and I highly recommend the Craftsy class. (Craftsy classes are also available on bluprint.com, which is a streaming site with a monthly subscription fee).

Day one, part two was about upcycling oversized t-shirts, ill-fitting sweaters, polo shirts, etc and re-making them to fit.  Description from her website:  Do you have collections of those oversized T-shirts from vacations, school activities, concerts, etc? Thanks to Pamela’s Patterns, you can take those big T-shirts and turn them into fitted and stylish tops you’ll be proud to wear anywhere! The technique is simple and fast. In no time you could have a whole new wardrobe of cute tops.

Pamela has a pattern for the upcycling with instructions for the process.  She showed us a variety of logo t-shirts that she downsized to fit, along with some very cool sweaters and cardigans.  These garments came from discount or thrift stores, in large sizes so she could customize them.  Her advice was to look at these garments as fabric.  She has a pattern that is drafted specifically for the makeover process.

Tshirt Makeover patternAt the end of Day 1, Pamela measured everyone who was attending Day 2 (The Perfect T-shirt) so we could get started right away with pattern adjustments and cutting fabric.

Pamela also has a number of You-Tube videos for her patterns.

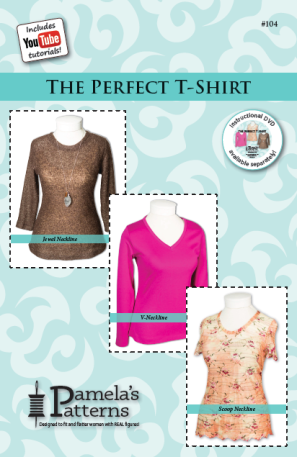
Day 2 was Pamela’s Perfect T-Shirt class.  Description:  A T-Shirt can be more than a comfy top you throw on to do housework. A nice-fitting T-shirt can be the most versatile top in your wardrobe. This selection from Pamela’s Patterns addresses all the fitting issues women face (rounded shoulders and back, full bust, hip room, etc.), and gives you a T-shirt you’ll be proud to wear anywhere! Make it casual, dressy, or anything in-between. 

Pamela also includes a darted front pattern piece (to be used for a C cup or higher), along with a non-darted front (A & B cup users).

Perfect T-Shirt

I have made this ‘T-Shirt’ a few times, so I wore one of them to the first day of class.  Based on the t-shirt I wore, Pamela had suggestions for alterations I needed to make to the pattern.  And since I had already made this I wanted to use a different pattern.  One of the good things about her pattern line is all the garments are for knits.  And the changes you make to one top or dress pattern, would be made to all the patterns.  Necklines and sleeves are also interchangeable, so if you have a few patterns, you can make a variety of garments pretty quickly.  This is, of course, unless you are like me and make everything more complicated than it needs to be.  (You will see that next).

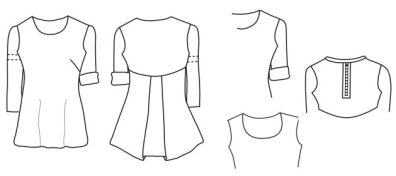
I decided to make the “Pleated Back Flowy Tee”.

Pattern photo

We adjusted the pattern (reduced the shoulder length, and the width across the upper front and I used the darted front).  That was it!

Pamela spent time in the class evaluating everyone’s fabric to make sure it was suitable (and worth your time to make the top). “Suitable” fabric is good quality, has good recovery & drapes well.  The recovery property is key.  A few people brought unsuitable fabric, so were able to purchase fabric from her.

I chose an ITY knit I purchased from FabricMart fabrics about a year ago.  It has a striped effect, and I wanted the stripes vertical, so I needed to cut the pattern out on the cross-grain.  The colors are black, beige and purple.  IRL, the purple is darker – more like a burgundy-purple (I call that raisin) and the portion that looks white is really a beige.  But you can see the stripe effect in the photo.

P1020087

The front of the T-Shirt:

Front

And here is where it gets complicated.  I was placing the upper back pattern piece on the fabric when I realized I would need to MATCH STRIPES!  You see, there is a horizontal seam in the back that creates the “flowy back”.  And it is curved.

Line Drawing

Oh my…so I looked around the room and found someone who had black fabric.  She graciously gave me her leftover piece.  I decided to cut a strip for the back as a separation so stripes would not have to be matched.  Since the seam was curved, the piece I added needed to be curved.  I cut a piece of black that was 3 1/2 inches high and the length of the seam.  That allowed for seam allowances to sew the strip to the upper and lower back pieces and have the small separation.  I then adjusted the upper and lower back fabric pieces to accommodate the strip.   I also cut a strip of the black so I could use black to bind the neckline.

All those changes added enough time to my work that I did not finish the top in class.  My final changes were to remove 2 inches from the shirt length, and 3 inches from the sleeve length.  With my busy fabric print, you can’t see the pleat in the lower back, but it lays nicely. Pamela wore this top in a solid color sweater knit in class, and it looked nice in that fabric as well.

Back

Several people did finish their “Perfect T-Shirt” in class and all of them looked wonderful.  And they all fit very well too.  Everyone was very happy with their creations.

Throughout the day, Pamela demonstrated a variety of techniques mentioned in the pattern, to ensure everyone understood them and could try them.  The class was paced perfectly and Pamela is a patient instructor.

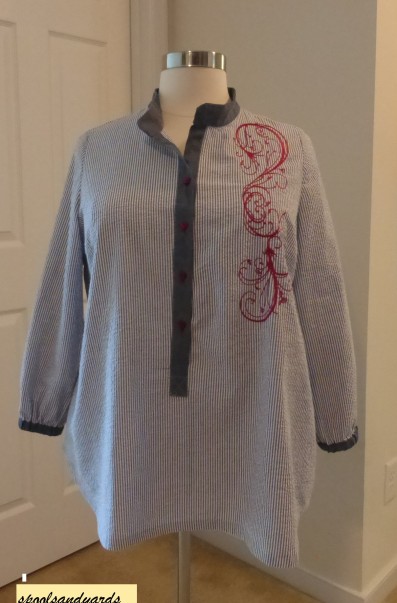
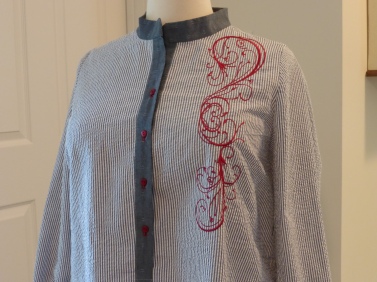
On to the next project – a woven blouse is in process.


Catching up

I have a few things I made last year but never blogged.  So this will be a catch-up post and hopefully I will stay on track better this year.  Warning – this is a bit long so grab a snack and enjoy!

One task that took up my sewing time throughout last year was making glitter vests for a group of senior dancers.  The group is called “Encore Dancers” and a friend is in the group.  The group dances at assisted living locations in the area and they have a different theme every month.  Therefore they need multiple vests.  The leader of the group made “one size fits nobody” vests for everyone sometime ago.  The vest my friend showed me was not lined, pretty tired and falling apart.  So my friend asked if I would make her a new vest.  A new vest for her led to multiple vests for her and 5 of the dancers.  Now they each have their own pattern and I can make one of those vests in my sleep.  Here is a sample of the “March” green.  It reverses to silver.  They wear white button-down cotton blouses under the vests, with jeans or black pants, depending on the month.

Dancing Ladies Vest

I enjoyed doing the vests for them, and watched one of their performances.  The leader is 81 and moves like someone half her age.  The rest are mostly in their 70’s.  They are a great inspiration to stay healthy and keep moving!

_______________________________________________________________________________________________

My Talbots Knock-off using Vogue 1451.

When I do buy RTW, generally I shop at Talbots.  I wait for sales, can find items that fit and their clothes last.  Their pants fit me well and are comfortable (unlike almost all the pant patterns I have tried).  I saw this shirt, was not willing to pay full price nor wait for it to be on sale.  The fabric was a little thin for my taste and the fabric I had was a nice cotton.  Of course I wanted to play with embroidery on clothing.  Here is the top I wanted to knock off.

Talbots catalog

I had the blue striped seersucker in my resource center from Hancock’s (remember them?).  I was looking at my patterns and this one from Sandra Betzina was fairly new.

Pattern

I decided to make the shirt, with sleeves and without the banded bottom.  On my version, I used a chambray for the contrast.  I made a few other changes as well.  My version:

V1541 full

I shortened the shirt a few inches, and shortened the front placket about 6 inches.  I thought the placement of the end of the placket was ‘odd’ on the pattern envelope.  And on me, it would end up in an awkward spot.  I also gathered the sleeves like the Talbots version.  One note:  The neckline in the pattern picture is misleading.  It looks like an open Vee, but in fact it is not.  I would like to make this again, but will make a few more changes.  I will shorten it even more, and removed some of the volume in the hips.  Also will open the neckline a bit, more like the pattern photo looks like it should be.  (That is why we sew, right?).

And for the embroidery; I spent a lot of time looking on line and through my library of designs for something similar to the inspiration picture. I didn’t necessarily want a design inside a box like the inspiration, but needed one that was a bit rectangular.  So, I made a muslin of the shirt, and on that muslin tried out the embroidery design.  It is actually two designs combined from the Amazing Designs embroidery disk called Sweetheart Scrolls.

Emb design

I did put a design on both sides of the muslin and it just seemed like too much.  So I chose to only embroider one side.  Besides, if you do both sides they have to match exactly!  More stress!

A close-up of the embroidery:

V1541 Close

Next up:  A scarf for the ASG Annual meeting challenge.  The challenge was to take 1 yd of white cotton fabric and make something.  You could do anything to the fabric that you wanted, but could not add any other fabric to it.  Trims, embellishments, dyeing, embroidery, beads, etc were all OK.  Since there is no way I can get an entire garment out of 1 yard of fabric, I decided to make a scarf.  This is the “Spiral Scarf” from the Sewing with Nancy Sensational Scarves booklet by Nancy Zieman.  I have made a few of these scarves; they are good for me because I have a short neck and scarves with a lot of fabric are not good for me.  This is basically a straight grain piece of fabric sewn into a spiral.  I often take a RTW scarf and cut it up to make a couple of scarves just to reduce the amount of fabric that would end up around my neck.

Image of the book.

Spiral Scarf 09_2018

I dyed the white fabric & cut the strip for the scarf (there is a formula in the book depending on the length you want your scarf).  My first experience with dyeing fabric.  Then used fabric paint and a flower & leaf stencil to add the painted designs.  The final touch was a few embroidered leaves using variegated thread.  I didn’t win a prize, but enjoyed the process.  The cotton fabric makes this scarf a little stiff – lighter weight and fabrics with drape are better for the spiral scarf, but it is wearable in a color that suits me.

Stenciled scarf 1

A close-up of the stencil and embroidered leaf.  The seams of the scarf that make the spiral are less noticeable in a soft print fabric.

Stenciled scarf 2

On the Home Dec front, there were a few things going on as well.  Most of my house is decorated in a pretty neutral manner.  Lots of earth tones, few bright colors.  I accessorize with color in holiday/seasonal decorating.  I feel that the powder room (guest bathroom) is a place to be a little wild with the decorating.  You don’t spend a lot of time in there generally and it gives you something to look at when you are in there.  So, in my powder room I have a black, white and red décor, with zebra wall paper on all 4 walls.  I wanted some sort of art piece on the wall that grabs your eye when you walk in.  I couldn’t find anything I liked and I don’t have the time nor patience to go 100 places to find the right thing.

Enter my sewing skills.  I made a wall-hanging in a crazy quilt pattern using fabrics in guess what?  Black, red and white, along with gold because I always need some bling!  In my embarrassingly large Craftsy class library I have Crazy Quilts with Allie Aller.  I used the simple straight edges pattern for the blocks.  After I put them together, I added some embroidery of roses in the corners.  After that I was paralyzed.  I didn’t want it to have stitching in every seam like more vintage crazy quilts.  I wanted to keep it simple.  I agonized over it for a year; then finally just decided to do a little stitching, add some bling and call it done.  (During 2017 I was trying to finish UFOs and not create new ones). I bought a plan black frame, put it together and hung it on the wall.

View from the doorway.

P1010855

P1010853

Close-up of 1 block.

P1010854

That’s it for now.  I have a few more items, but I have to gather the photos and info so that will be another post.


The Artful T-Shirt (Vogue 9057)

There is a Craftsy.com class called “The Artful T-shirt“, which I have in my embarrassingly large class list.  The pattern that goes with this class is Vogue 9057. Normally the art to wear items are not in my wheel house, but I thought I would give it a try.  A slightly blurred photo of the pattern envelope and line drawing below.

Pattern Envelope

V9057[1]

Fitting:  I did a pattern mash-up of Vogue 1363 (mentioned in this post) for the shoulder to bust area because I know it fits.  I placed V9057 on top of V1363 and traced the area below the bust to achieve the angled hem of View B.  My first version was a test, so it is not very “Artful”.  The print is a cotton spandex from Fabric.com and the sleeves and neck binding are a cotton knit from the scraps in the resource center.

V9057 Summer version front

The second version could be considered artful.  The print is a poly spandex from scraps of a previous t-shirt that was eliminated from the wardrobe due to poor fit.  The orange color is a cotton knit also from scraps.  I don’t recall what I made from that so it must have been a long time ago.  I chopped up the pattern and also did some piecing as you can see on the back to make the fabric fit the pattern pieces.  The two fabrics are slightly different weights, but still seem to work together.  The brown fabric is a sheer cotton burnout jersey use before. The yoke is two layers of fabric so I could use the burrito method to finish it – but also since it is very thin 2 layers were needed for stability.  The sleeves are 1 layer and not hemmed.  This fabric stretches when the hem is sewn, so I just left it raw this time.

Front (on me..)

Front

And the left back:

V9057 Side back

I enjoyed the creativity of pulling together the various fabrics for this.  The jury is out on the style, and I am finding I am not crazy about leggings on me.  My knees are not thin so I don’t think leggings are my most flattering look.  I need a little more room around the thighs and knees. Will I wear this?  Yes, around the house since I work from home and want to be comfortable while working, but still look decent when I go outside to walk the dog, answer the door, etc.  This outfit will probably not see a lot of public wear.  But it is fun to try new things!

Thanks for visiting!